800-821-2686
614-420-4572
2783 Martin Rd.
Dublin, OH 43017
513-926-6186
9891 Montgomery, Rd.
Cincinnati, Ohio 45242
937-222-2269
2324 Stanley Avenue
Dayton, Ohio 45404
Local Technicians equal Great Service!!
800-821-2686
 Our local certified technicians and our access to repair and replacement parts will keep your system operational. We service all Nortel telephone systems including the BCM50, BCM100, BCM200, BCM400, BCM450, CICS and MICS running conventional telephony using the M7310 M7324 M7208 M7100 model telephones and the IP based telephones. Nortel phones have been a leader in communication services for decades, and Ohio Tele-Net is proud to offer Nortel’s high quality and reliable business phones and systems to its customers.
To Log Into System Programming:
1. Press FEATURE * * 2 6 6 3 4 4
2. Enter Password: 2 6 6 3 4 4 Display will read: ” A. Configuration”
Programming System Speed Dials:
Follow steps 1-3 under “Log Into System Features”
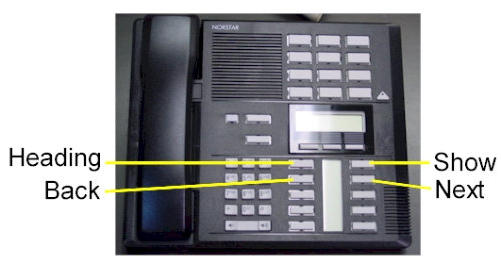
4. Press: SHOW Display will read: “1. Sys speed dial”
5. Press: SHOW Display will read: “Speed Dial #:___”
6. Enter: 01 or 02 or 03 etc… Display will read: “Speed dial #:01”
7. Press: SHOW Display will read: “No number stored”
8. Press the “CHANGE” softkey. Display will read: “#01:
9. Enter the Speed Dial number
10. Press the “OK” softkey.
11. Press: NEXT Display will read: “Use prime line”
12. Press: NEXT Display will read: “Display digits:Y”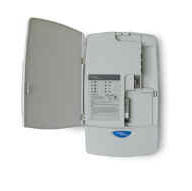
13. Press: NEXT Display will read: “Bypass restr’n:N”
14. Press: NEXT Speed dial 01 has now been programmed:
To program another Speed Dial Number, repeat steps 6 thru 14.
Changing a name on a phone
Follow steps 1-3 under “Log Into System Features”
4. Press: SHOW Display will read: “1. Sys speed dial”
5. Press: NEXT Display will read: “2. Names”
6. Press the SHOW Display will read: “Set names”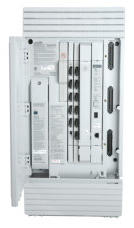
7. Press: SHOW Display will read: “Show set:__”
8. Enter the extension number of which you wish to change the name
9. Press the CHANGE softkey
10. Using the dial pad spell out the name
11. Press: NEXT (if you fail to do this step, the name will not be saved!!!)
12. Press the RLS key
To Change the Time and date:
1. Press FEATURE * * T I M E
2. Enter Password: 2 6 6 3 4 4
3. Press NEXT Display will read: “Date DD MM YY”
4. Press the CHANGE softkey Display will read: “Year: # # “
5. Press the CHANGE softkey, (If the year is incorrect) Display will read: “Year: _ “
6. Enter the new YEAR Display will then read the new Year programmed.
7. Press NEXT Display will read: “Month: # # “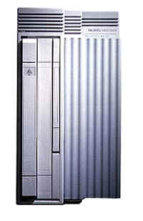
8. Press the CHANGE softkey, (If the month is incorrect) Display will read: “Month: _ “
9. Enter the new MONTH Display will then read the new Month programmed
10. Press NEXT Display will read: “Month: # # “
11 Press the CHANGE softkey, (If the day is incorrect) Display will read: “Day: _ “
12. Enter the new DAY Display will then read the new Day programmed
13. Press the CHANGE softkey Display will read: “Hour:
14. Press the CHANGE softkey Display will read: “Hour: _ “
15. Enter the new HOUR. (in 24-hour format – Ex.: 5:00pm = 17:00.
Display will then read the new Hour programmed.
16. Press NEXT Display will read: “Minutes: # # “
17. Press the CHANGE softkey Display will read: “Minutes”: _ “
18. Enter the new MINUTES.
Nortel is known throughout the world as a leader in communication services, including Voice over IP. With a business phone system from Nortel, your company will be able to take advantage of Nortel’s years of experience as an innovator in the communication technology field.An effective and reliable communication system is vital to the success of your business. Without a reliable phone system, you may be prone to missing or dropping calls from customers, which could lead to a dramatic loss in revenue. Also, an ineffective communication system with fellow employees can lead to decreased productivity and efficiency. In either case, an unreliable phone system could dramatically affect your bottom line. By using Nortel phones, you will be able to avoid all of these problems. Trying to fix a faulty phone system can take up much of your valuable time – time which you should be spending doing the work you are supposed to be doing. With Nortel phones, customer service and employee efficiency will be maximized. To find the Nortel phone system that will best suit your business, browse through our inventory of Nortel Phones.Nortel M7208 Telephone (model NT8B30)Nortel M7310 Telephone (model NT8B20)Nortel M7324 Telephone (model NT8B40)Nortel Networks T7208 Telephone (model NT8B26)Nortel Networks T7316 Telephone (model NT8B27A)Nortel Networks T7316E Telephone (model NT8B27JA)
Nortel BCM Call Center Agent User Guide Meridian Business Telephone Systems
Legacy Business Telephone Systems:
Do you have a legacy telephone system and are looking for a new vendor? We are ready to serve!!! Our seasoned Technicians work on Vertical, Comdial, Nortel, Vodavi, Toshiba, AT&T, Avaya, Lucent, Panasonic, NEC and many others.
Nortel BCM Call Center Agent User Guide Meridian Business Telephone Systems
800-821-2686
Nortel BCM Call Center Agent User Guide Meridian Business Telephone Systems
 Loading...
https://computercablingohio.com/manuals/Nortel%20Norstar%20Meridian/BCM%202.0%20Attendant%20Console%20User%20Guide%20-%20Version%202.pdf

Chapter 1 Introduction to Enterprise Edge Attendant Console 7
About this guide 8
Conventions 8
Console Attendant window terms 8
Using keyboard shortcuts 8
Using right-click capability 10
References 10
Chapter 2 Understanding Enterprise Edge Attendant Console 11
Server component 11
Client component 11
Reports component 12
Enterprise Edge Attendant Console features 12
Easy to use, time saving Graphical User Interface (GUI) 12
Advanced software capabilities 12
PC compatibility 13
Attendant types 13
Chapter 3 Getting started 15
Starting the Client component 15
Minimizing and maximizing the Attendant Console window 15
Quitting the Client component 16
Initializing and configuring the Client component 16
Starting the Client component for the first time 16
Types of attendant setups 17
Setting up other attendant features 21
Chapter 4 Using the Attendant Console window 25
Components of the Attendant Console window 25
Title bar 25
Menu bar 25
Toolbar 26
Loop buttons 26
Caller Information options 26
Call processing area 26
Directory list 27
Status Bar 27
Using the menu bar 28
File menu 28
Edit menu 28
4 Contents
Enterprise Edge 2.0 Attendant Console User Guide P0911960 Issue 02
View menu 29
Tools menu 29
Transfer menu 30
Caller menu 31
Target menu 32
Attendant menu 32
Help menu 33
Using the toolbar 33
Using Caller Information options 35
Using the call processing area 37
Using the Directory options 38
Search and edit functions in the Directory options 38
Directory list 41
Chapter 5 Handling calls 45
Answering calls as an attendant 45
Finding the called person’s extension and placing it in the Target list
box 47
Using the Contacts boxes 47
Using the Directory tab views 48
Using the Directory Find box 48
Using the Department list box 49
Transferring a call 49
Parking, holding and screening calls 51
Parking calls and paging employees 51
Placing and retrieving calls on hold 54
Screening calls 55
Contacting employees using Voice Call 55
Linking and Joining calls 56
Handling a callback call 57
Responding to a callback that an extension did not answer 57
Responding to a callback that a called party returned 57
Making a call from the attendant’s extension 59
Handling calls at an employee’s telephone 60
Chapter 6 Maintaining caller and employee information 63
Maintaining caller information 63
Creating a new caller record 63
Finding and editing caller information 66
Maintaining employee information 67
Using the Directory list 68
Finding an employee record 68
Editing employee information 70
Contents 5
P0911960 Issue 02 Enterprise Edge 2.0 Attendant Console User Guide
Chapter 7 Generating reports 75
Report types 75
Calls by Customers report 75
Calls to Employees report 75
Extension Directory report 76
Using the Reports window 76
Database box 76
Information list box 76
Period list box 77
Employees and Customers options 78
Creating and viewing reports 79
Loading the database 79
Selecting a report type 80
Setting the report period 80
Selecting employees and customers for the report 82
Create Report button 83
Viewing the report 83
Printing a report 84
Glossary 85
Index 89
Enterprise Edge Attendant Console is an application that provides centralized call
management and call activity reporting capability to a business. Enterprise Edge
Enterprise Edge Attendant Console runs on one or more Pentium® class personal Nortel BCM Call Center Agent User Guide Meridian Business Telephone Systems
computers (PCs).
You can customize the way Enterprise Edge Attendant Console is set up to suit your
company’s call management requirements. A telephone attendant uses the
graphical user interface to:
• originate calls
• answer and manage multiple calls
• view a company’s name before answering a call
• record, add and change caller information for future use
• quickly access information about a caller
• transfer calls to employees or their voice message mailbox
• send the caller’s name to the employee’s Enterprise Edge telephone display Nortel BCM Call Center Agent User Guide Meridian Business Telephone Systems
• park calls and page employees
• view information in a Directory about your company’s employees such as their
extension number, person status and telephone status
• create and print reports showing how incoming calls are handled
• view the status of extensions in the company’s Enterprise Edge Attendant
Console system
1
8 Introduction to Enterprise Edge Attendant Console
Enterprise Edge 2.0 Attendant Console User Guide P0911960 Issue 02
About this guide
This document describes how the Enterprise Edge Attendant Console works and
how to use it in your company. The instructions in this guide are intended for
experienced PC users. The Enterprise Edge 2.0 Attendant Console User Guide is
organized as follows: Nortel BCM Call Center Agent User Guide Meridian Business Telephone Systems
Conventions
Console Attendant window terms
Refer to Components of the Attendant Console window on page 25 for the terms
used in this document.
Using keyboard shortcuts
You can use the keyboard to do many tasks quickly in Enterprise Edge Attendant
Console. There are three kinds of keyboard shortcuts. The first two are standard to
Windows. The third shortcut is unique to Enterprise Edge Attendant Console. The
keyboard shortcuts are: Nortel BCM Call Center Agent User Guide Meridian Business Telephone Systems
• Access keys, which are the letters underlined in menu names and commands.
For more information, refer to Access keys on page 9.
• Shortcut keys defined on the menus. For more information, refer to Shortcut
keys defined on the menus on page 9.
• Shortcuts initiated by pressing the Alt key and another key. For more
information, refer to Shortcuts initiated by pressing the Alt key and another
key on page 9.
1. Introduction to Enterprise Edge
Attendant Console
provides an overview of how this guide is organized,
offers references and explains shortcut keys and rightclick
capability.
2. Understanding
Enterprise Edge Attendant Console Nortel BCM Call Center Agent User Guide Meridian Business Telephone Systems
explains how Enterprise Edge works and the features
available with Enterprise Edge Attendant Console.
3. Getting started describes how to start, minimize, maximize and close
the Client component and the different Attendant
setups.
4. Working with the Attendant
window
explains the components of the Enterprise Edge
Attendant Console window.
5. Handling calls explains how an attendant answers and directs
incoming calls and how a person being called answers
and manages calls.
6. Maintaining caller and employee
information
describes how you enter, edit and maintain caller and
employee information.
7. Generating reports explains how to use the Reports component to generate
and customize reports.
Glossary defines the Enterprise Edge Attendant Console terms
and acronyms used in this guide.
Index provides an alphabetical list of information in this
guide.
Introduction to Enterprise Edge Attendant Console 9
P0911960 Issue 02 Enterprise Edge 2.0 Attendant Console User Guide
Access keys
In Enterprise Edge Attendant Console, each menu name and each command in the
menu has an underlined letter called an Access key.
To use the Access keys:
1. Press the Alt key.
This gives you access to the menu names in the menu bar.
2. Press the Access key for the menu name. For example, to open the Edit menu,
press Alt and then E.
3. Press the Access key for the desired command. For example, to select Caller Information
from the Edit menu, press I and the Edit Caller Information dialog
box appears.
Shortcut keys defined on the menus
Shortcut key combinations are shown beside some menu commands. When you use
the Ctrl key and another key, press Ctrl key while you press the other key. The
additional shortcut keys are: Nortel BCM Call Center Agent User Guide Meridian Business Telephone Systems
In the Edit menu:
In the Transfer menu: Nortel BCM Call Center Agent User Guide Meridian Business Telephone Systems
In the Caller menu:
Shortcuts initiated by pressing the Alt key and another key
You can access Call handling functions directly from the Attendant window by
pressing the Alt key and the underlined keys in the commands. You must press the
Alt key while you press other key. For example, to place an active call on Hold,
press the Alt key and press H Nortel BCM Call Center Agent User Guide Meridian Business Telephone Systems
